
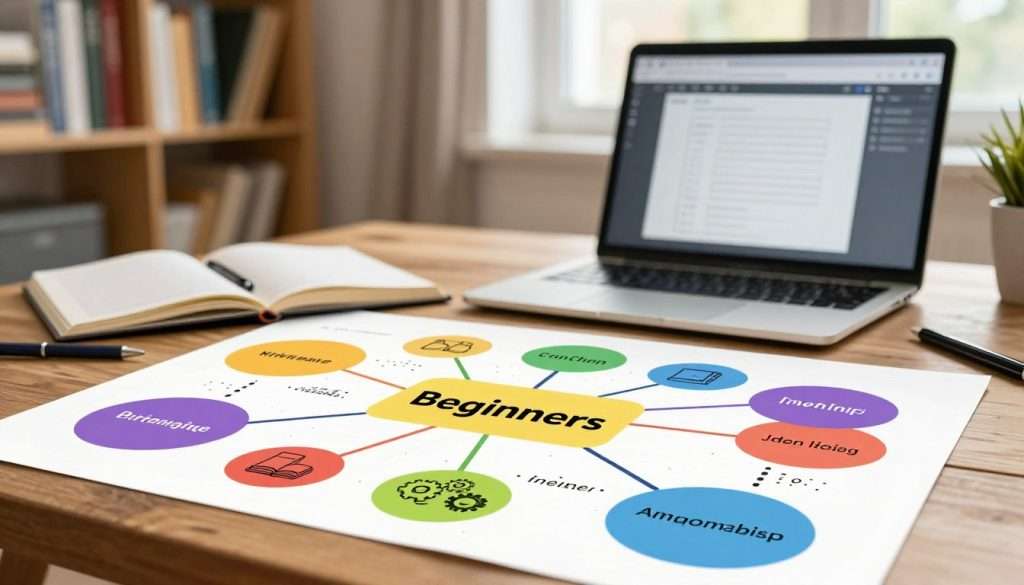
Ever feel like your study notes are a mess? It’s like trying to untangle earbuds. Mind mapping for beginners can turn that mess into something clear.
With a central idea, colorful branches, and key words, you can visualize complex information easily. It’s not just about making your notes look good. Studies show it can boost your memory by 10–15%.
We aim to help you go beyond just memorizing. This guide will show you a simple six-step process. You’ll learn how to pick your main topic and review your diagram for the best results.
Key Takeaways
- Mind mapping transforms messy notes into organized, visual diagrams.
- Using colors and branches helps your brain process data more effectively.
- Students often see a 10–15% improvement in memory recall.
- This technique is a practical tool for long-term learning, not just decoration.
- You will follow a clear, six-step path to master this skill today.
Mind Mapping for Beginners: How to Visualize and Retain Complex Information
Mind mapping is like creating a visual neighborhood for your ideas. Instead of looking at a wall of text, you draw a map. This shows how your thoughts connect. It makes studying creative and manageable.
This technique might seem new, but it’s actually old. Philosophers like Porphyry of Tyros used tree-like diagrams in the third century. It’s a timeless way to understand the world.
What a Mind Map Is and How It Organizes Ideas
A mind map is a simple diagram with one central idea. From there, you draw branches to related topics and details. It’s a visual representation of your thinking.
It’s like decluttering your mind. By putting your main idea in the middle, you focus on what’s important. This structure helps you see the big picture and keep details handy.
Why Visual Structure Supports Understanding and Memory
We often struggle with memorizing isolated facts. Cognitive mapping changes that. It turns information into a web of relationships. This is how our brains naturally store memories.
“The mind is not a vessel to be filled, but a fire to be kindled.”
Using colors, lines, and symbols engages more of your brain than standard note-taking. This active engagement makes recalling information easier. You’re not just reading; you’re building a mental landscape.
Who Can Benefit From Mind Mapping
Mind mapping is for almost anyone. It helps students, professionals, and lifelong learners. It’s a tool for anyone looking to organize their thoughts.
- Students can prepare for exams without memorizing everything.
- Professionals can organize meetings and brainstorm solutions.
- Lifelong learners can map out new subjects to understand core concepts.
By focusing on understanding relationships, you gain a big advantage. You’ll spend less time reviewing and more time applying what you’ve learned.
Prepare Your Topic, Materials, and Learning Goal
Success in mind mapping begins before you start drawing. Organizing your thoughts first makes your map effective, not messy. It’s like preparing for your best performance.
Choose a Focused Central Topic
Don’t try to map everything at once. Pick one specific question or theme. A broad topic makes your map too cluttered and hard to follow.
Define Whether You Need to Understand, Review, Plan, or Memorize
Know what you want to achieve before starting. Are you trying to understand a complex idea or just review something? Your goal shapes your map’s structure and detail.
Select Paper, Colored Pens, or a Digital Mind-Mapping Tool
The right tools are crucial for mind mapping techniques. You might like markers on paper or digital visual learning tools. Choose what keeps your mind active and engaged.
When Hand-Drawn Maps Are Most Useful
Hand-drawn maps are great for deep focus and memory. Writing and drawing strengthen your brain’s connection to the information. They’re ideal for brainstorming without screen distractions.
When Digital Maps Make More Sense
Digital tools are best for changing branches or adding links. They’re perfect for projects needing updates. Just keep your focus on the content, not the tools themselves.
Step 1: Place the Main Idea at the Center
Think of your mind map as a solar system. Everything revolves around a central sun. By placing your main idea in the middle, you create a clear home base for all your branches. This is a key mind mapping technique to keep your thoughts organized.
Write a Short Central Phrase or Draw a Simple Image
You don’t need to be an artist to make this work. A simple word or quick sketch is often more powerful than a long sentence. Keep it punchy!
Using a short phrase gives your brain room to expand. This helps you visualize complex information without feeling overwhelmed.
Keep the Topic Specific Enough to Guide the Map
A common mistake is choosing a topic that’s too broad. If your center is vague, your branches will get lost. You need a topic that acts like a compass, guiding your notes.
Think of your central idea as a filter. If information doesn’t relate directly to it, it shouldn’t be on that map.
Example: Turning a Broad Biology Topic Into a Usable Focus
Let’s narrow your scope for better results. Instead of “Biology” in the center, try “Cellular Respiration Stages.” This gives your study a clear goal.
| Broad Topic | Specific Focus | Why It Works |
|---|---|---|
| Biology | Cellular Respiration | Provides a clear boundary for study. |
| History | Causes of the Civil War | Prevents irrelevant information. |
| Marketing | Social Media Strategy | Allows for deep, actionable branches. |
By choosing a specific center, you make studying easier. Your maps will become better tools for learning and understanding.
Step 2: Add the Primary Branches
Think of your central idea as the trunk of a tree. Now, we need to grow the main branches. This is a key part of cognitive mapping. It helps you see how different pieces of information relate to each other.

Identify the Major Categories Connected to the Main Topic
Start by looking at your central topic. Ask yourself what the big “buckets” of information are. These should be the high-level themes that hold everything else together. By grouping your thoughts early, you are using effective study techniques that save you time later on.
Limit the First Layer to the Most Important Ideas
It’s tempting to add every little detail right away. But try to resist that urge! Keep your first layer limited to only the most essential categories. This keeps your map clean and prevents you from feeling overwhelmed by too much clutter.
Arrange Branches to Reflect the Topic’s Natural Structure
The way you lay out your branches should feel logical to your brain. You might want to arrange them clockwise or group them by how they appear in your source material. When the structure mimics the natural flow of the subject, your memory will thank you.
Using Categories for a Textbook Chapter
If you are mapping out a chapter for class, try using these standard categories to keep things organized:
- Key Terms: The vocabulary you need to master.
- Processes: The step-by-step actions or cycles.
- Causes: The “why” behind the events.
- Examples: Real-world applications to make it stick.
- Questions: Areas where you need more clarity.
Using Categories for a Project or Decision
When you are planning a project or making a tough choice, your branches should focus on action and accountability. Try using these categories to stay on track:
- Tasks: The specific jobs that need doing.
- People: Who is involved or needs to be informed.
- Deadlines: When things need to be finished.
- Risks: Potential hurdles you might face.
By using these effective study techniques, you turn a messy pile of notes into a clear, visual guide. This form of cognitive mapping ensures that you are not just memorizing facts, but truly understanding the connections between them.
Step 3: Expand Each Branch With Supporting Details
You have the basic idea, but now it’s time to flesh it out. This is where you visualize complex information by breaking it down into smaller parts.
Add Facts, Examples, Definitions, and Subtopics
Look at each main branch and think about what supports it. You might add a definition, example, or fact to make it stick.
Think of this as building a tree. The main branch is like the trunk, and your subtopics are the limbs that hold the leaves of knowledge.
Use Keywords Instead of Long Sentences
Don’t write full sentences on your map. Use short, punchy keywords instead. This helps your brain process the information better.
When you use cognitive mapping, you want your eyes to quickly understand the connections between ideas. Long sentences just make it harder to see these connections.
Connect Related Ideas Across Different Branches
Sometimes, an idea in one branch relates to another. Don’t hesitate to draw a line between them to show that connection!
For example, in biology, you might link “photosynthesis” to “cellular respiration” to show their connection. These cross-links are key to cognitive mapping.
How to Decide Which Details Belong on the Map
It’s easy to add too much information. Ask yourself: “Does this detail help me answer my central question?”
If not, leave it out. Keep extra details in a separate notebook to keep your map clear.
How to Prevent the Map From Becoming Cluttered
A cluttered map is confusing. If you’re running out of space, simplify your keywords or start a new map for that subtopic.
| Feature | Keyword-Based Notes | Sentence-Based Notes |
|---|---|---|
| Processing Speed | Fast and intuitive | Slow and linear |
| Memory Retention | High (Active recall) | Low (Passive reading) |
| Visual Clarity | Clean and organized | Cluttered and dense |
| Flexibility | Easy to add links | Hard to reorganize |
By keeping your map simple, you make it easier to visualize complex information anytime. Focus on the essentials, and your brain will appreciate the clarity!
Step 4: Make the Map Visual and Easy to Scan
Let’s turn your basic outline into a vibrant tool that sticks in your brain. By using visual learning tools with intention, you make a static page into a dynamic map. This map is easy for your mind to navigate.
Use Colors to Separate Categories and Show Relationships
Colors are not just for decoration; they are powerful signals for your brain. Assigning a specific color to a main branch helps your eyes group related information instantly.
Keep your color system simple and repeatable. Use blue for “Biology” and red for “History” throughout your notes. This keeps things clear.
Use Images, Symbols, and Icons as Memory Cues
Our brains process images much faster than text. Adding a small icon or a quick sketch next to a keyword can act as a mental anchor. This makes recalling complex concepts easier later.
You don’t need to be an artist to make this work. Simple symbols like a lightbulb for an idea or a question mark for a confusing topic can significantly improve memory skills.

Vary Line Thickness, Letter Size, and Placement With Purpose
Your map should have a clear hierarchy. Guide your eyes from the most important ideas to the smaller details. Use thick, bold lines for main branches and thinner lines for subtopics.
Play with font sizes to show importance. Larger, bolder text for central concepts helps you identify the core theme at a single glance.
Color-Coding Rules That Improve Recall
To get the most out of your colors, follow these simple guidelines:
- Limit your palette: Stick to 3-5 colors to avoid overwhelming your senses.
- Be consistent: Use the same color for all sub-branches belonging to a main category.
- Highlight connections: Use a bright, contrasting color to draw lines between related ideas in different branches.
Visual Choices That Distract More Than They Help
It’s easy to get carried away and turn your study session into an art project. Remember, the goal is to understand, not to create a masterpiece.
Avoid using too many colors or overly complex drawings that clutter the page. If your map looks like a rainbow, you might lose the actual information in the noise. Keep it clean, simple, and focus on the content.
Step 5: Turn Notes, Textbooks, and Lectures Into Mind Maps
Turning static text into a dynamic mind map is a top effective study technique. It makes you an active learner instead of just reading. Visual learning tools help your brain organize and connect information in a meaningful way.
Convert a Textbook Chapter Into a Hierarchical Map
Begin by looking at the chapter’s main headings and subheadings. These will be your primary branches. As you read, add core concepts under these branches to create a clear hierarchy.
Capture the Main Ideas During a Lecture
Don’t write down every word your professor says. Focus on the big ideas and their connections. If you miss something, keep moving forward with your map.
Transform Linear Notes Into Connected Concepts
Give old, linear notes a makeover. Look for recurring themes and connect related ideas. This helps you see the big picture instead of just facts.
Separate Essential Information From Supporting Evidence
Use different styles for main ideas and extra details. Bold text for main ideas and thinner lines for supporting evidence. This makes your map easy to scan.
Mark Questions and Unclear Areas for Later Review
If something confuses you, don’t skip it. Use a bright red question mark to flag it. This way, you know what to ask or look up later.
Mind mapping is great, but some info might need a traditional outline or timeline. Choose the right tool for the job to succeed.
| Feature | Linear Notes | Mind Maps |
|---|---|---|
| Structure | Sequential/List | Radiant/Connected |
| Engagement | Passive | Active/Creative |
| Recall | Lower | Higher |
| Best For | Drafting/Timelines | Brainstorming/Review |
By using these effective study techniques daily, complex topics will become easier. Keep trying different visual learning tools until you find what works best for you!
Step 6: Use Mind Maps to Improve Memory and Understanding
You’ve created a beautiful map, but how do you make sure it stays with you? It’s time to treat your diagram as a tool for your brain. By using effective study techniques, you can go beyond just recognizing information and truly understand it.
Explain the Map Without Looking at Your Notes
Teaching someone else, even an empty room, is the best way to learn. Try explaining each part of your map out loud without looking at your notes. If you struggle with a section, it’s a sign to review that part again.
Use Active Recall to Test Each Branch
Instead of just reading your notes, make your brain work hard. Active recall is a powerful way to improve memory skills. It forces you to remember information from scratch. Try to sketch out or recite each branch from memory.
Review the Map With Spaced Repetition
Don’t try to learn everything at once. Use spaced repetition to review your map at different times. For example, review it one day, three days, and one week later. This method helps you keep information for a long time, not just for tomorrow’s quiz.
First Review: Correct Gaps and Misunderstandings
Your first review is for fixing mistakes. Look for areas where your map seems weak or confusing. This is the best time to add missing details or clear up unclear concepts.
Later Reviews: Reconstruct the Structure From Memory
As you get more comfortable, try to rebuild the entire map from memory. This deep-level processing helps you improve memory skills and keep information long after the exam. By regularly using these effective study techniques, you make learning a reliable and stress-free habit.
Common Mind-Mapping Mistakes and How to Fix Them
Are you making mistakes that hurt your study sessions? Even the best effective study techniques can go wrong if you’re not careful. Let’s find out how to improve your study habits.
Writing Complete Paragraphs Instead of Memorable Keywords
Writing full sentences in your map is a big mistake. It makes your brain slow down. Instead, use single keywords to help your memory. This keeps your mind sharp and makes reviewing easier.
Adding Too Many Equal-Level Details
It’s easy to add too much information. But too many details make your map messy. Focus on the most important points and use sub-branches for the rest.
Using Decorative Colors Without Meaning
Colors should help organize your thoughts, not just look good. Random colors don’t help. Use specific colors for different themes to make your map more useful.
Copying Information Without Processing It
Just copying from your textbook is a waste of time. You need to understand the information to remember it. Always think about what a point means before adding it to your map.
“Learning is not a spectator sport. It requires active engagement and the courage to make mistakes.”
Creating One Map and Never Revisiting It
A map is a work in progress, not a finished project. If you don’t go back to it, you miss out on learning. Make revisiting your maps a regular habit. This is one of the best effective study techniques for keeping information in your long-term memory.
Practical Ways to Apply Mind Mapping to School, Work, and Daily Life
Mind maps are your secret weapon for tackling big projects or organizing your thoughts. They turn abstract ideas into clear paths. This method helps you improve memory skills and tackle almost any challenge.
Studying for Exams and Reviewing Complex Subjects
Don’t just re-read your textbook when exams are near. Create a master map that links core concepts to examples. This is a top effective study technique that makes your brain work hard.
Planning Essays, Presentations, and Research Projects
Starting a blank page can be tough. Use a mind map to organize your thoughts. This structure makes your work flow smoothly from one point to the next.
Organizing Meetings, Goals, and Personal Decisions
Life can get messy, but your planning doesn’t have to. Use a mind map for weekly goals or big decisions. It helps you see the “big picture” and keeps everything organized.
| Feature | Traditional Notes | Mind Mapping |
|---|---|---|
| Structure | Linear and rigid | Organic and flexible |
| Recall | Low retention | High retention |
| Creativity | Limited | Highly encouraged |
| Application | Text-heavy | Versatile for all tasks |
Going Deeper With the Free Book How to Become the Smartest Student in the Classroom
If this article struck a chord, we have something special for you. Our free book, How to Become the Smartest Student in the Classroom, offers a full system to master learning.
What the Free Book Covers: Memory Techniques and Study Routines
We explore effective study techniques that really work. You’ll learn to build routines that save time and improve memory skills without cramming stress.
Call to Action: Get the Free Copy at https://www.studyingmachine.com/free-books/
There’s no cost or catch. Get your free copy here: https://www.studyingmachine.com/free-books/ and start changing your learning today!
Conclusion
You now have a powerful toolkit to change how you process new ideas. Start with a central idea and add meaningful branches. This way, you can easily see complex information.
These maps work best when you use them with active recall and regular review. While linear outlines are good for some tasks, mind mapping is great for seeing the big picture. It makes it easier to remember information by showing how ideas connect.
Want to learn more? If this guide was helpful, check out my free book “How to Become the Smartest Student in the Classroom”. It offers memory techniques, study routines, and strategies that really work. There’s no cost and no catch.
Get your free copy here at Studying Machine. Start your journey to smarter learning today.